We use cookies to deliver you the best experience. By browsing our website you agree to our use of cookies. Learn More
Custom Modifications
-
Cargo Bike Project

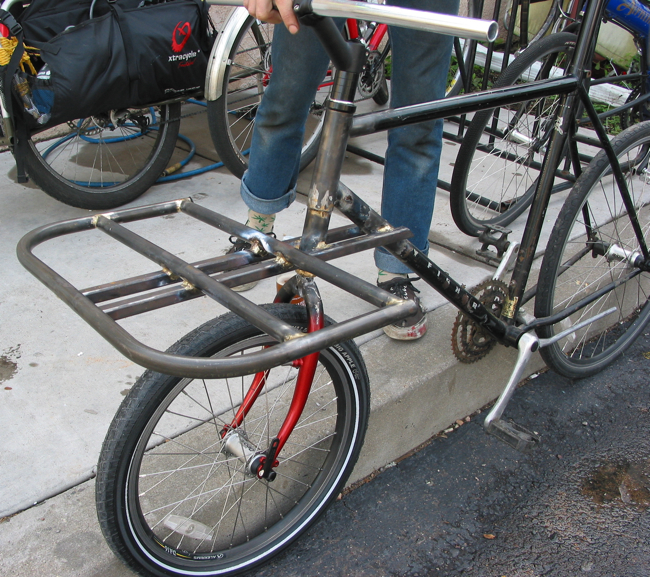
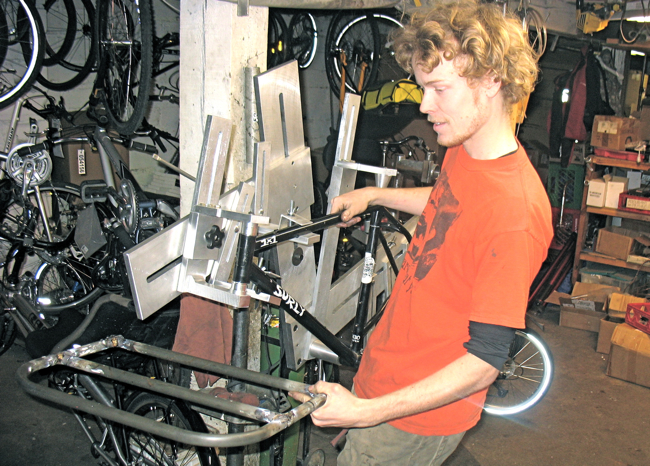
Front end of Marlin's Cargo bike Basement projects at Perennial Cycle cover a pretty wide array of bike related interests. Marlin is a mechanic at the shop that recently learned how to use the torch and was looking for a fun, practical project. This cargo bike project is Marlin's take on a practical load carrying bike that you can ride around all day without feeling as though your driving a bus, or a tank.

Marlin's "to scale" drawing for cargo bike project There were a lot of little sketches like this around when the project was going strong. This is the most detailed drawing I ever saw of the Cargo Bike. I'd say that Marlin had a little extra energy after having a sandwich from Caffrey's (I recognize the bag). The sandwich bag sketch gives the main idea behind the design..
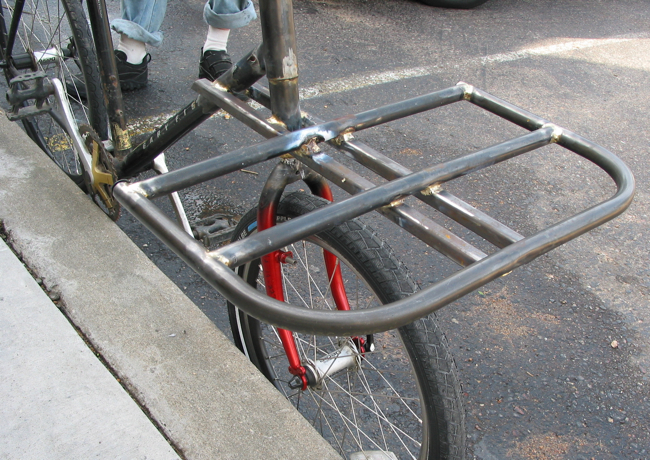
The frame is a steel 90's Fischer mountain bike frame that had a oversized (1-1/4") headset. To convert the front end to fit a 20" front wheel he got a 1-1/8" headtube that happened to fit nicely inside the original headtube and used the new headtube to extend the headtube down. This allowed him to put a large, heavy duty (yet lightweight) rack on the front of the bike.

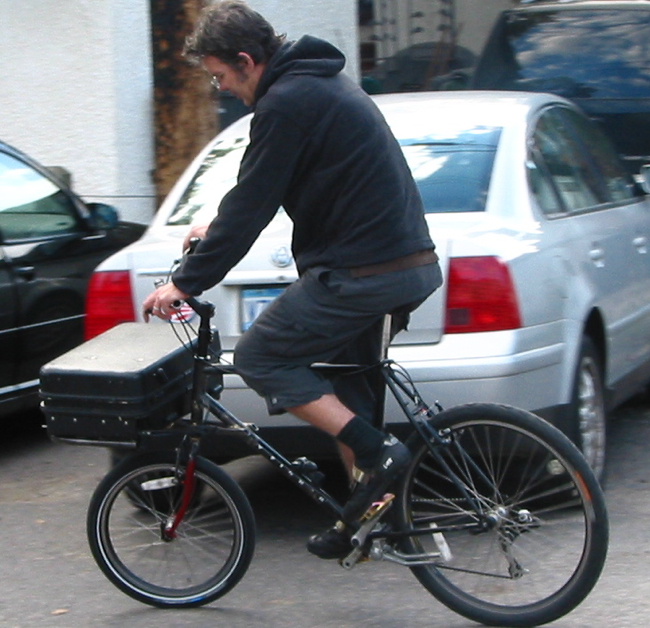
The rack is brazed onto the frame of the bike and thus when you turn the bike, it does not move with the fork and handlebars like you'd expect a front basket to. The fact that the rack is quite low (this is the reason for the 20" front wheel) means that the weight on the rack does not throw off the handling of the bike much at all. When there is not a load on the rack you don't even notice that the bike is cargo-minded.
You can see a lot more of Marlin's work and see more current projects at his website http://utilitariantransports.com/
Nice work Marlin!
-
Take a Look Mirrors by Bike Peddler

The three versions of the Take a Look Mirrors Take a Look Mirrors are well designed, highly adjustable mirrors that attach to your glasses, helmet visor or your helmet using the stick-on helmet adapter. The mirror itself is a glass mirror of good quality and the components of the mounting hardware are stainless steel with brass sleeves. I have found the mirrors to be very durable and due to the brass sleeves being used as pivot points they are extremely adjustable. These are the best glasses/helmet mounting mirrors on the market.The designer of this product was a dentist and his first attempts at creating a cycling mirror was to tape a dental mirror onto his glasses.
The mirrors re sold in 3 versions:
Original
Compact
Original with stick-on helmet mount
The original has larger mirror (1-1/2" x 1") and longer reach (over 3" from the front of the mounting clip to the mirror). This mirror tends to work when mounting to a helmet visor or to the stick-on mounting adapter for helmets.
Being that the Compact model has a smaller mirror as well as less reach it tends to be best for those that are going to use the mirror with glasses. When attaching the mirror to glasses it will tend to be closer to your eye and thus the smaller mirror will suffice for seeing behind you without blocking too much of your forward view.
Take a Look Original mounted onto a helmet visor. Over the years I have moved between handlebar mounted mirrors and glasses/helmet mounted mirrors a few times. Thus the excellent selection of mirrors at Perennial Cycle.
The last couple of years I have been switching between a few different bikes and am finding it easiest to have a Take A Look mirror attached to the visor of my helmet and thus I'm always prepared with a mirror. I am currently using the Original Take a Look attached to my helmet's visor. I actually have drilled a tiny hole in my visor and used a little zip tie to permanently attach the mirror my visor. I did this after losing a couple mirrors because I set the helmet down and accidentally knock the mirror off the visor...

Take a Look Mirror Mounted to visor with zip tie. I also ended up putting a bend in my Original mounting bracket model to optimize the position. Being that I switch between a laid back recumbent and an upright bike I feel that I have to play around with the mirror position a little more than I would have to if I was riding one or the other. The used the mirror for a while without the bend and then did my tweaking which has worked out very well.

Custom Original (bend ahead of mounting clip) I wouldn't recommend customizing your mirror until you have used it for a while and have gotten the hang of adjusting it. If you do choose to customize your Take a Look mirror be sure to make the bend on a stainless steel (silver) section of the mount. The brass sleeve is a softer metal and will be the first part to bend if your attempting to do this without a good grip (tools) and then the brass sleeve will break later as it's not thick enough to be bent. I used 2 needle nosed pliers to hold the stainless rod securely as I "formed" it.
-
Tubus Rack Extenders for Surly Karate Monkey

Chris with their Karate Monkey The Surly Karate Monkey is a well known machine in the world of 29ers (bikes with extra large 29" wheels). The horizontal dropouts are great for single speed, fixie or internal gear set ups, yet a derailleur hanger on the dropout makes it easy to add gears.
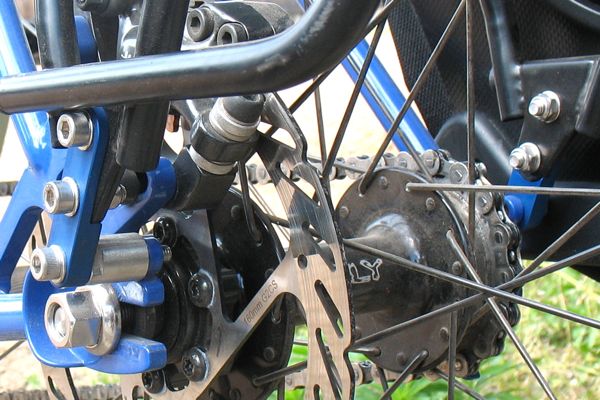
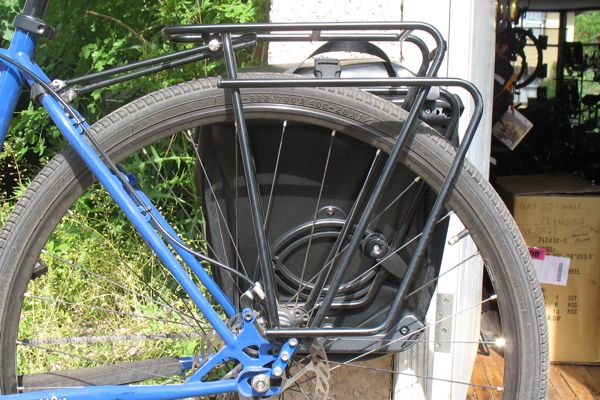
Chris digs his Karate Monkey a lot and came in ready to add a sweet rack and get some nice panniers for hauling a bit of his world around with him on his bike. The Tubus Logo was his rear rack of choice, but it looked like it would barely clear his rear tire (too low!) and being that he has a pair of bigger tires at home (to say nothing of fitting fenders to the bike) this tight clearance cannot be ignored.

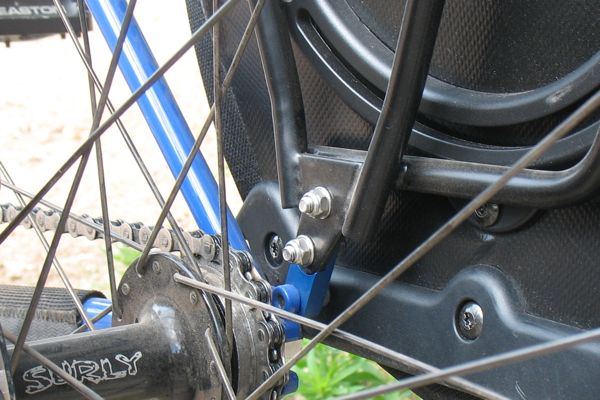
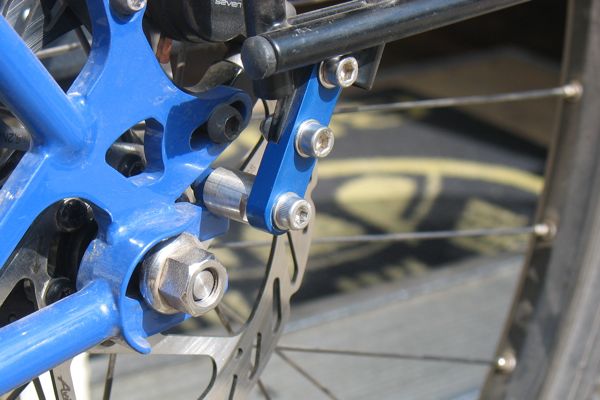
Lucky for him he is well versed in a software program called Solidworks. He created a drawing of the hardware he needed to extend the height of the Logo Rack and then sent his drawing (as a digital file) to a machinist that made the hardware (and even anodized them blue to match his bike).
The disc brake side (pictured above) is using a 17mm Disco Rack Spacer (a Perennial Cycle custom product) as a way to clear the disc brake.
Very Nice work Chris!


Search the Blog
Latest Posts
Blog Categories
- At the Market (1)
- Bags! Bags! Bags! (14)
- Bike Culture (14)
- Bike Profile (12)
- Custom Modifications (11)
- Event Recap (5)
- Events (13)
- General (11)
- Holiday Gift Guide (11)
- Instructional (11)
- Miscellaneous (35)
- News (49)
- Perennial Favorites (18)
- Product Showcase (70)
- Repair Highlight (12)
- Ride Chatter (20)
- Service (4)
- Shop Fun (13)
- Used Bicycles (0)
Instagram
We're Social : )
Validate your login
Sign In
Create New Account